7.9 KiB
MVC Pattern & Repositories
The MVC Pattern
- For creating APIs, we now know how to
- set up an ASP.NET Core web application,
- set up routes with attributes to connect request URIs with methods,
- respond with HTTP responses
- The problem is that all this functionality is scattered here and there around the program, meaning we have no structure to what we are doing
- In order to write production level code, your API should follow the MVC pattern
The MVC Pattern (continued)
- Helps to enforce separation of concerns , and induce code readability and testability
- Acronym for Model - View - Controller
- Model
- Representation of data in code
- Could also include some logic to retrieve and save the data
- View
- The data that is shown to the client, e.g. web page
- More often than not different from the Model - client does not need to (and often shouldn't) see all possible data
- Controller
- Communicates with the Model and the View
- How the data (models) will be processed before sending it forwards to the client or to the view
- Model
In an API, the pattern is implemented like this:
class User
{
public int Id {get; set;}
public string Name {get; set;}
}
Get()
Post()
...
{
"id": 1
"name": "Sonja"
}
The "view" in APIs is basically just JSON data
Exercise 1. Setting up the Project
Create a new ASP.NET Core Web API template project. Name it CourseAPI. Delete WeatherForecastController.cs and WeatherForecast.cs.
Add a new controller CoursesController by right-clicking the Controllers folder and selecting Add > Controller… > API Controller > Empty
Add a new folder Models. Inside, add a new class file ( Add > Class… ) Course.cs
To the Course class, create the properties int Id, string Name and int Credits
Exercise 2: Creating GET Endpoints
Inside the Controller class, initialize a list of courses with a couple of test courses
Create endpoints for GET requests with URIs api/courses and api/courses/{id} which return all courses and a single course with a corresponding ID, respectively
Repositories
- When following the separation of concerns principle, the controllers or models should NOT be accessing the database directly
- Instead, the web app should have some kind of repository for reading from and writing to the database
- For now, we can just create a mock repository to a new folder called "Repositories" for our needs, and make it static so that it can be accessed everywhere
- Later on, we will add services to make the repository available within our program via dependency injection
Repository Example
public class MockRepo
{
// Replace this later on with a database context
private List Students { get; set; }
// Constructor to initialize student list
private MockRepo(){
Students = new List();
}
// Replace this later on with dependency injection
public static MockRepo Instance { get; } = new MockRepo();
public List GetStudents() => Students;
// Update database here later
// Other methods to read/write from database
// ...
}
At this point, implementation of the db is up to you Later, real database is added
Repository Example (continued)
In the controller class:
[HttpGet]
public List Get()
{
return MockRepo.Instance.GetStudents();
}
At this point, implementation of the db is up to you Later, real database is added
Exercise 3: Using a Repository
Continue working on CourseAPI.
Within the solution, create a folder called Repositories
Add a mock repository to the folder. Move the course list from the controller to the repository to simulate our database for now. Add methods to get all courses in the list and a single course by ID.
Modify the controller so that it uses the repository for getting courses.
Services
- Services and dependency injection (DI) have been mentioned during this course
- Recap: DI allows for loose coupling between classes and their dependencies
- This decreases complexity, makes refactoring easier and increases code testability
- DI is used in ASP.NET to distribute services to classes in a controlled way
- Let's get started by making a repository service
- Recap: Repositories are the interface for handling operations to a database
- Repositories should be accessible within the API from multiple controllers
- Logical step is to make it a service!
Services (continued)
Create a service interface and a class implementing it:
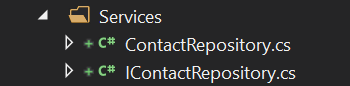
Repository for each model? 1 repo for all tightly coupled models
Add _all _ methods of the service to the interface:
public interface IContactRepository
{
Contact GetContact(int id);
List GetContacts();
void AddContact(Contact contact);
void UpdateContact(int id, Contact contact);
void DeleteContact(int id);
// UpdateDataBase() later on...
}
Create the class which implements the interface:
public class ContactRepository : IContactRepository
{
// Replace this with database context in a real life application
private static List Contacts = new List
{
new Contact{Id=0, Name="Johannes Kantola", Email="johkant@example.com"},
new Contact{Id=1, Name="Rene Orosz", Email="rene_king@example.com"}
};
public void AddContact(Contact contact) => Contacts.Add(contact);
public void DeleteContact(int id) =>
Contacts = Contacts.Where(c => c.Id != id).ToList();
public Contact GetContact(int id) => Contacts.FirstOrDefault(c => c.Id == id);
public List GetContacts() => Contacts;
public void UpdateContact(int id, Contact newContact) =>
Contacts = Contacts.Select(c => c.Id != id ? c : newContact).ToList();
}
The service is now ready to be added to the container in the Program.cs file:
// ...
builder.Services.AddSingleton<IContactRepository, ContactRepository>();
builder.Services.AddControllers().AddNewtonsoftJson();
// ...
Add the service to your controller by creating a constructor and passing it as a parameter:
public class ContactsController : ControllerBase
{
private readonly IContactRepository _contactRepository;
public ContactsController(IContactRepository contactRepository)
{
_contactRepository = contactRepository;
}
}
If you need to add more services to the controller later, you can just add them as a parameter as well - the order of parameters does not matter!
That's it! Your service is now ready to be consumed by the controller (no need to use the Instance anymore!)
[HttpGet("{id}")]
public IActionResult GetContactById(int id)
{
Contact contact = _contactRepository.GetContact(id);
if (contact == null)
{
return NotFound();
}
return Ok(contact);
}
Exercise 4:
Continue working on CourseAPI.
Create an interface ICourseRepository with methods for getting a single course or all courses. Rename your mock repository to CourseRepository and make sure the interface is fully implemented.
Add CourseRepository as a service, and refactor the controller to use methods for ICourseRepository
Wrapping Things Up
At this point, the flow of your APIs should be in lines with this chart:
Client (e.g. Postman)
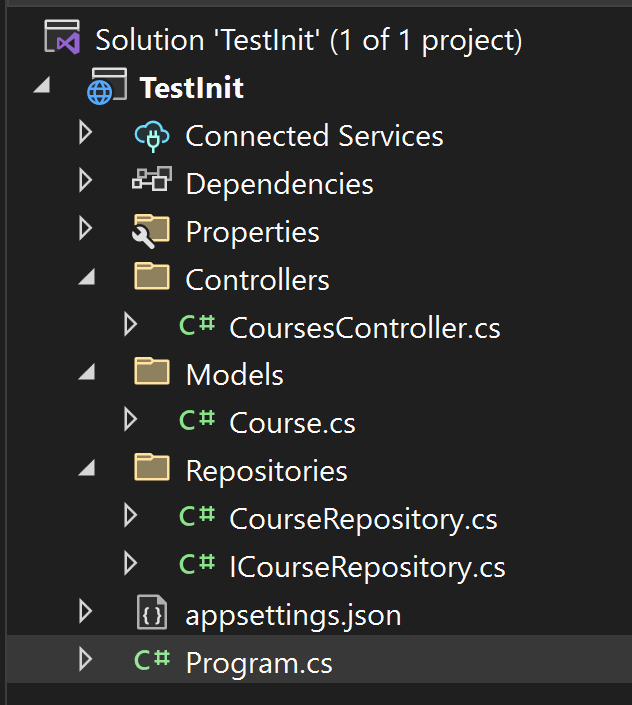
- In solution explorer, the project hierarchy would look like this
- Once you start adding new classes, they should have their own models and controllers
- One repository can store multiple models, and there can be multiple repositories
- Every server/database/API you use should have its own repository!
What the Heck Does This Do?
- A lot of the functionality in ASP.NET comes from the base class library
- At beginning, trying to remember all the methods and what did what can feel overwhelming
- If you ever end up getting confused about what did what, Ctrl + click Type name to go to definition
- There is always a summary about the method
- Also looking up the method from Microsoft documentation is helpful