You cannot select more than 25 topics
Topics must start with a letter or number, can include dashes ('-') and can be up to 35 characters long.
14 KiB
14 KiB
| marp | paginate | math | theme | title |
|---|---|---|---|---|
| true | true | mathjax | buutti | 1. Introduction to ASP.NET |
Introduction to ASP.NET
Getting started with ASP.NET
ASP.NET
- ASP.NET is a server-side framework developed by Microsoft
- Introduced in 2002
- Successor to Microsoft's Active Server Pages (ASP) technology
- Runs on the .NET platform, and can use all .NET supported programming languages
- A framework for building Internet-connected applications, like
- Web apps
- Web APIs
- Backend for desktop & mobile apps
ASP.NET Core
- ASP.NET Core is a complete redesign & rewrite of ASP.NET
- Introduced in 2016
- Initially ran on both versions of .NET (Framework and Core)
- .NET Framework support was eventually dropped
- Open source, cross-platform
- Enhanced security compared to ASP.NET
- We will be focusing on Web APIs and won't be covering the frontend development tools of ASP.NET
Why use ASP.NET Core?
- As a .NET application, supports NuGet packages that can be added to your projects modularly
- Full support for C#
- Base Class Library
- Great community support
- StackOverflow
- Open projects on GitHub
- Some companies have a long history with Microsoft frameworks
- ASP.NET is the logical choice in that case
- .NET is constantly getting updates and new releases
- Learn to read the documentation!
Swagger & Swagger UI
- Swagger (now OpenAPI) is a language-independent specification for describing REST APIs without needing to look at the source code
- Swagger UI: Web-based UI for automatically providing information about the API (actions and their capabilities) using the specification above
- The default implementation of Swagger UI in ASP.NET is called Swashbuckle (see docs)
- Useful for basic debugging and testing
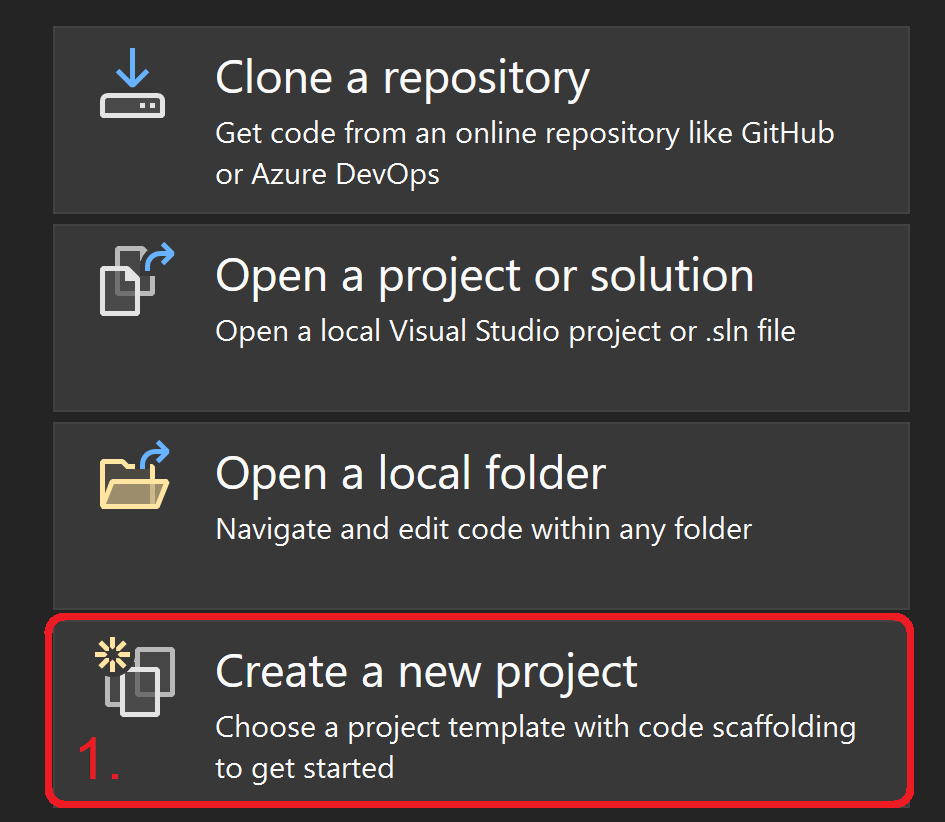
Exercise 1: Creating an ASP.NET Core Web Application
- Open Visual Studio and from the right select Create a new project
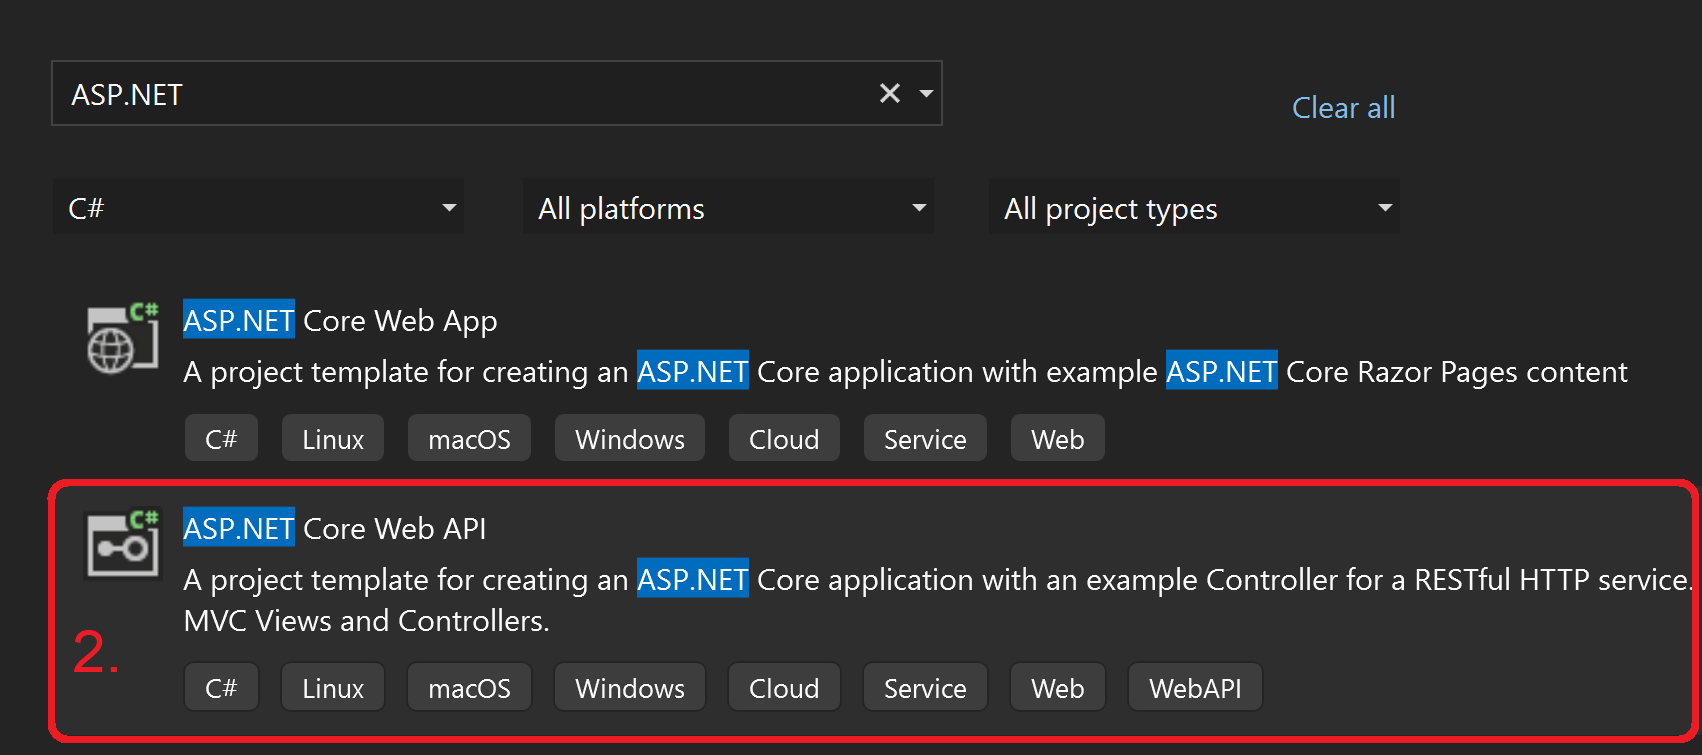
- Search for ASP.NET and select ASP.NET Core Web API (NOTE: Not Web App!)
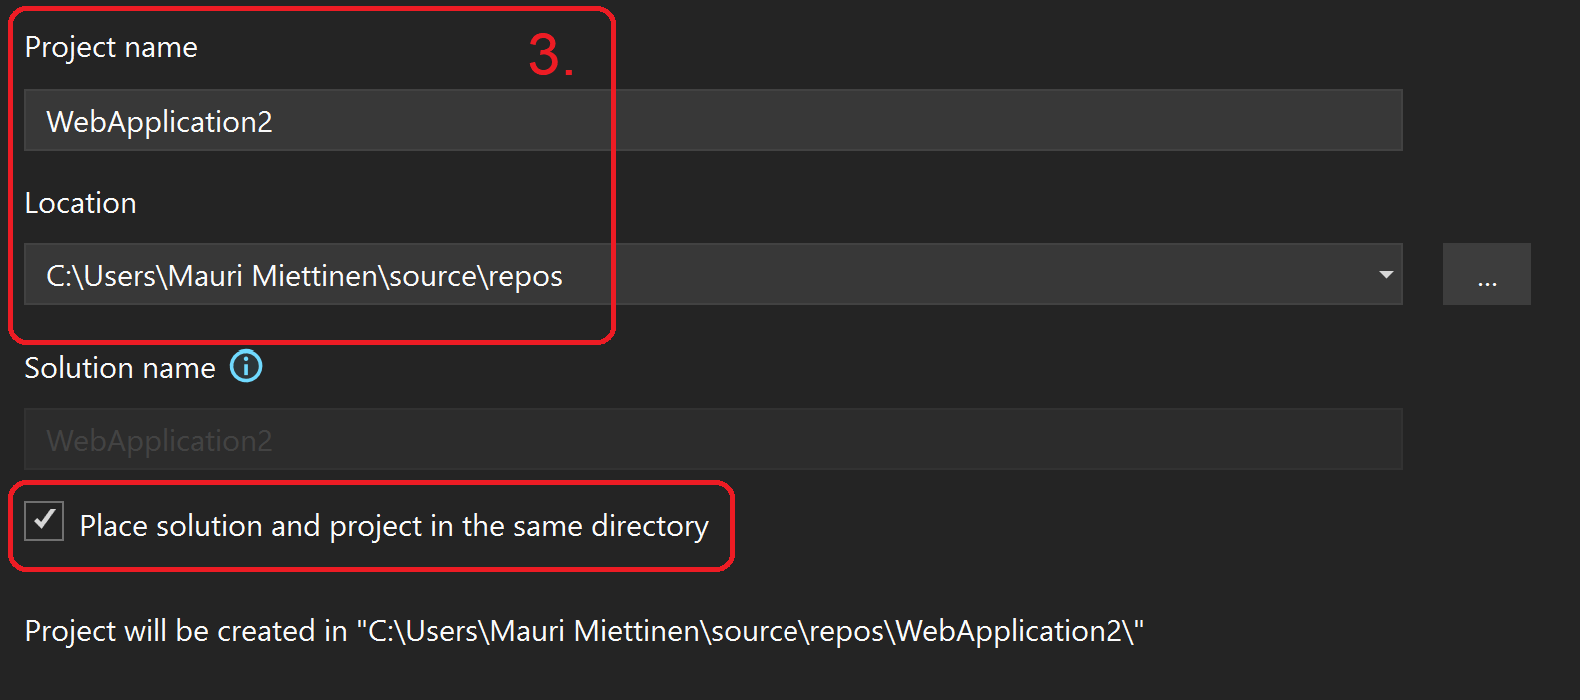
- Give a Project name and set a Location for the repository, and check Place solution and project in the same directory. Click Next in the bottom right corner.
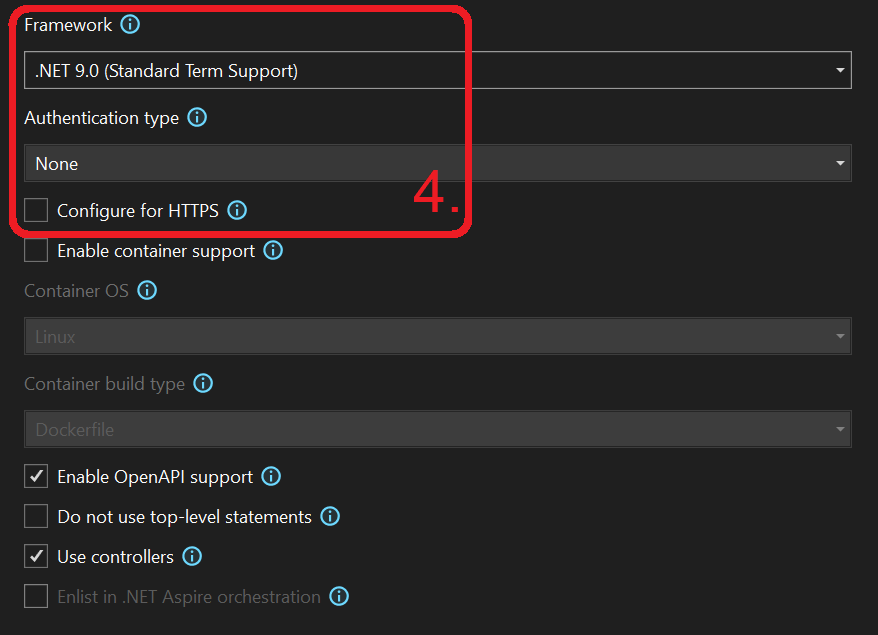
- Select .NET 9.0 under Framework. Authentication type should be None for now. Uncheck Configure for HTTPS. Click Create in the bottom right corner.
- Note: Configure for HTTPS would enforce HTTPS for added security (see docs)
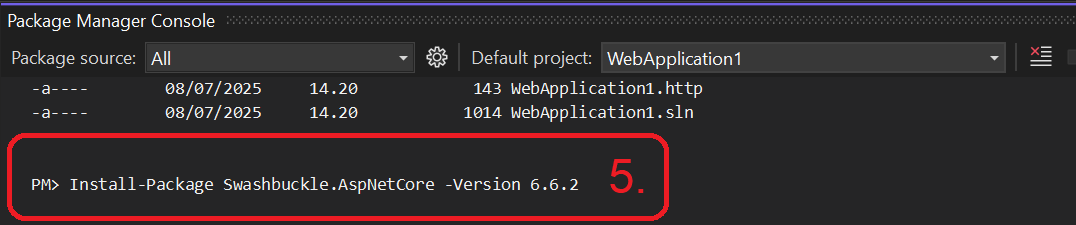
- Add Swagger to your project. Go to View > Other Windows > Package Manager Console and run the following command:
Install-Package Swashbuckle.AspNetCore -Version 6.6.2
- Make sure
Program.csincludes the following lines:builder.Services.AddControllers(); builder.Services.AddEndpointsApiExplorer(); // add this builder.Services.AddSwaggerGen(); // add this // ... if (app.Environment.IsDevelopment()) { app.UseSwagger(); // add this app.UseSwaggerUI(); // add this app.MapOpenApi(); }
- Start debugging from the top (the ▶ button with the text http).
- Click OK to trust the sertificates.

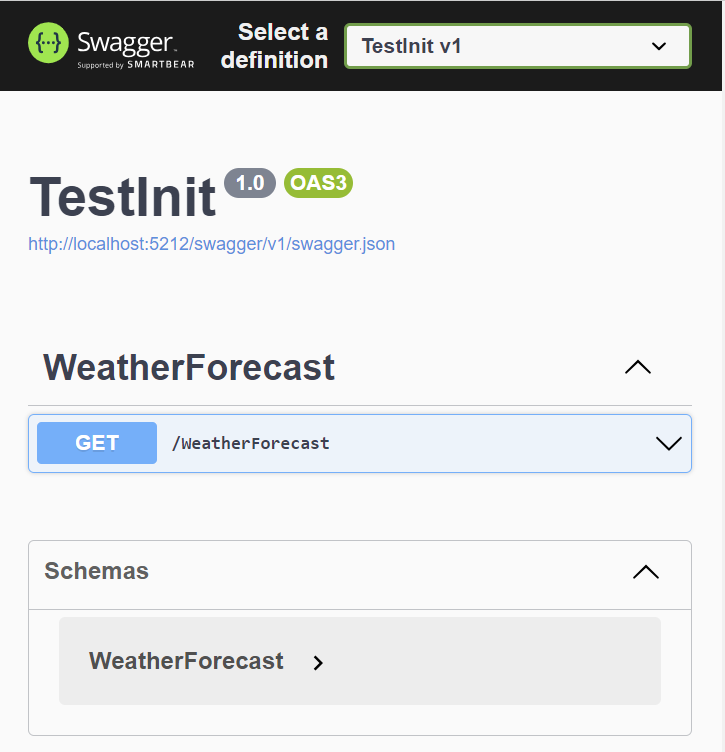
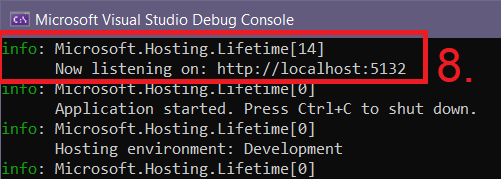
- Open the Swagger UI in a web browser by going to
http://localhost:<port>/swagger.- The port number is shown on the debug console window that should now be open.
- The port number is shown on the debug console window that should now be open.
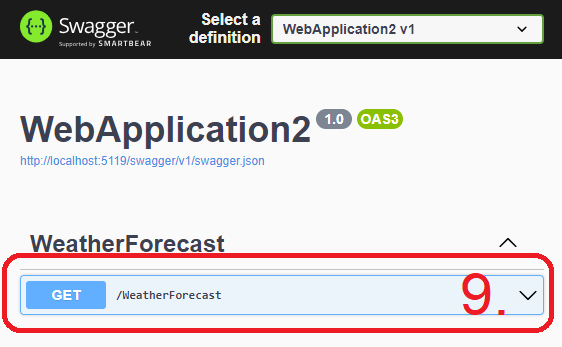
- A web page should open, showing SwaggerUI for a weather forecast API. Click it open 🔽.
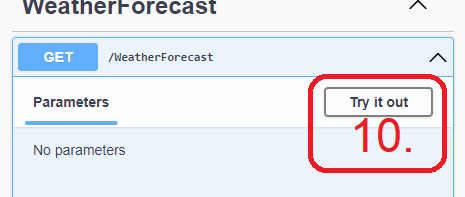
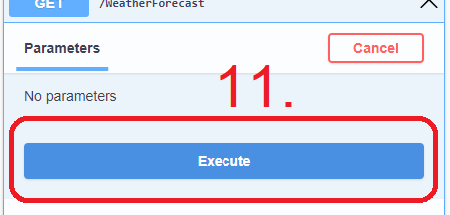
- Click Try it out, and 11. Execute the GET request and see what it returns.
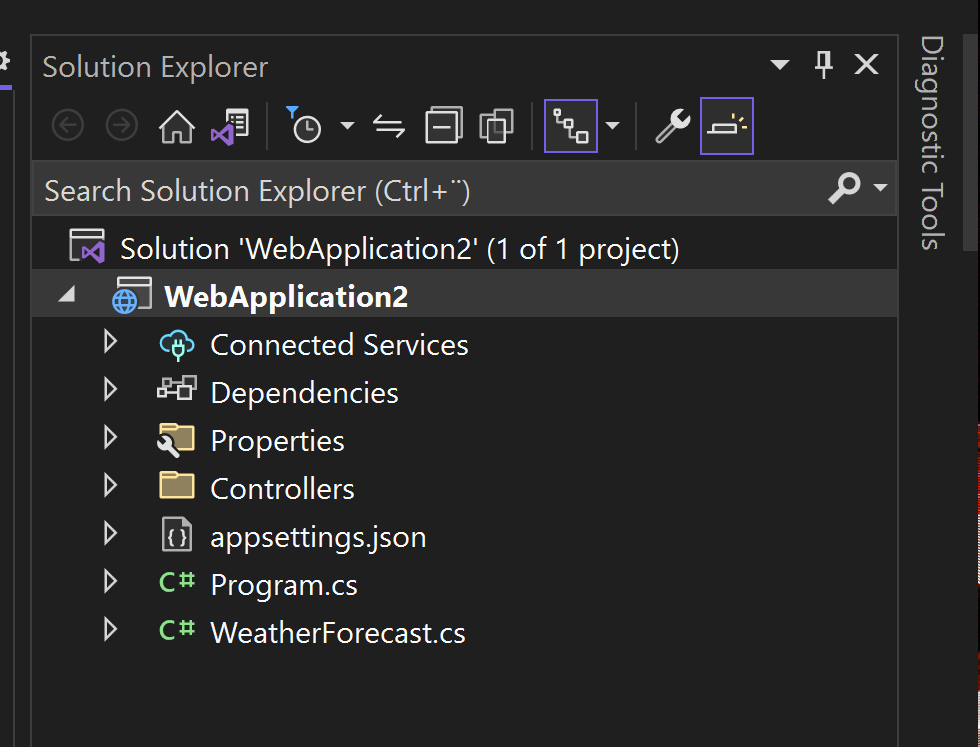
- Close the window. Browse through the source files on Solution Explorer on the right and check where the weather forecasts come from.
ASP.NET Core Web API contents
- In the previous exercise, we chose an API template for our new project, which have some files and dependencies already added
- The weather forecasts come from
WeatherForecastController.csin the Controllers folder- (More on Controllers later...)
- Throughout this training, the aim is to get an understanding of the underlying logic of ASP.NET Core
- You can use the API template for the assignments, though
The heart of the server: Program.cs
A default server program
- The
Program.csfile in ASP.NET 7 is where the services for the web application are configured and the middleware is defined - The file starts with defining the builder for the web application
var builder = WebApplication.CreateBuilder(args); - The program is actually a console application that also hosts a web server
- The default server in ASP.NET applications is Kestrel (lightweight, cross-platform)
- The old default is IIS (Windows-specific, nowadays used as a reverse proxy server)
Services
-
The controllers and some other components (like Swagger) are added to the application as services
- Services are components that are available anywhere within your program via dependency injection (introduced in C# Basics Lecture 15)
// Add services to the container. builder.Services.AddControllers(); builder.Services.AddEndpointsApiExplorer(); builder.Services.AddSwaggerGen(); -
As the comment above suggests, more services can be added as needed
Middlewares
- Handling of each HTTP request is defined as a set of middlewares
- Middleware is a software that's added into the middle of an app pipeline to handle requests and responses
- Middleware can decide whether to modify the data/request as needed, and pass the request into the next middleware
if (app.Environment.IsDevelopment()){
  app.UseSwagger();
  app.UseSwaggerUI();
  app.MapOpenApi();
}
app.UseAuthorization();
app.MapControllers();
app.Run();
An example controller: WeatherController.cs
Routing and endpoints
- Routing is how web APIs match the requested URI to a corresponding action
- The URIs that can be used to get a response from the API are called the endpoints of the API
| Request method | Endpoint | Action |
|---|---|---|
GET |
http://someserver.com/api/products |
GetProducts() |
GET |
http://someserver.com/api/products/3 |
GetProduct(int id) |
POST |
http://someserver.com/api/products |
PostProduct() |
Attributes
- Attributes (see C# Basics: Lecture 15) are a way of attaching metadata to entities (classes, methods, properties, etc.)
- In ASP.NET, attributes have a strong role in routing:
[ApiController]           // Attribute routing requirement,
                          // automatic HTTP 400 response, and more

[Route("[controller]")]   // URIs with "/weatherforecast" are routed to this class
public class WeatherForecastController : ControllerBase
{
  //...
  [HttpGet]               // HTTP GET requests are routed to this method
  public IEnumerable<WeatherForecast> Get()
  {
    //...
  }
}
Attribute Routing
| Attribute | Request | |
|---|---|---|
| Class: Method: |
[Route("api")][HttpGet] |
GET <localhost>/api |
| Class: Method: |
[Route("api")][HttpGet("products")] |
GET <localhost>/api/products |
| Class: Method: |
[Route("api")][HttpGet("products/{id}")] |
GET <localhost>/api/products/12 |
| Class: Method: |
[Route("api")][HttpPost("products")] |
POST <localhost>/api/products |
Exercise 2: Setting up Routes
- Change the routes in
WeatherForecastController.csso that the forecast result is printed athttp://localhost:<port>/api/weatherforecastinstead ofhttp://localhost:<port>/weatherforecast
You can see the route change in the Swagger UI GET method.
Handling HttpGet Requests
- We have now established how to call methods with HTTP requests
- Additional parameters can be passed to the method with the URI:
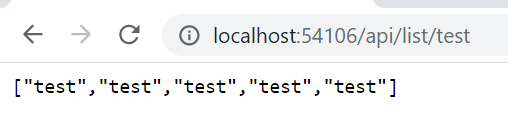
[Route("api")]
// class declaration
// ...

[HttpGet("list/{someText}")]
public string[] GetArrayOfStrings(string someText)
{
  return Enumerable.Range(1, 5).Select(index => new string(someText))
    .ToArray();
}
- The URI parameters can be made optional with '?'
- A default value must be then set for the method parameter:
[Route("api")]
// class declaration
// ...

[HttpGet("list/{someText?}")]
public string[] GetArrayOfStrings(string someText = "default")
{
  return Enumerable.Range(1, 5).Select(index => new string(someText))
    .ToArray();
}

- Apply constraints for the parameters by setting them after
: - If the URI doesn't fit the constraints, the response will hold a
404status code[HttpGet("products/{id:int}")] // Required type: int [HttpGet("list/{value:length(3,40)}")] // Required length: 3-40

Exercise 3: Returning Your Own List
- Change the
GETmethod so that instead of returning anIEnumerableofWeatherForecastobjects, it returns aListofstringobjects.- Fill the list with e.g. names and make it as long as you want. Test with browser (Swagger UI).
- Create a new method routed at
http://localhost:<port>/api/numberlist/k, wherekis any integer. The method should return an array of integers from1tok.- For example,
http://localhost:<port>/api/numberlist/5would return[1,2,3,4,5]. Test with browser (Swagger UI).
- For example,
Sending requests with Postman
Postman
- HTTP
POSTrequests cannot be made with the browser's address bar, onlyGET! - In websites,
POSTrequests are usually made with forms - In applications, all requests are sent by the client application
- For testing APIs, multiple tools like Postman or Insomnia exist
- Before we cover handling
POST,PUTand other requests in ASP.NET, let's first see how to make them with Postman

Benefits of using Postman
- When developing APIs, tools like Postman will almost always surface in the development cycle
- Postman lets you create configured HTTP requests to APIs, and save them to a JSON file
- This is great for testing your APIs without having to write code just for that purpose
- Supports all the necessary HTTP requests, like
GET,POST,PUTandDELETE
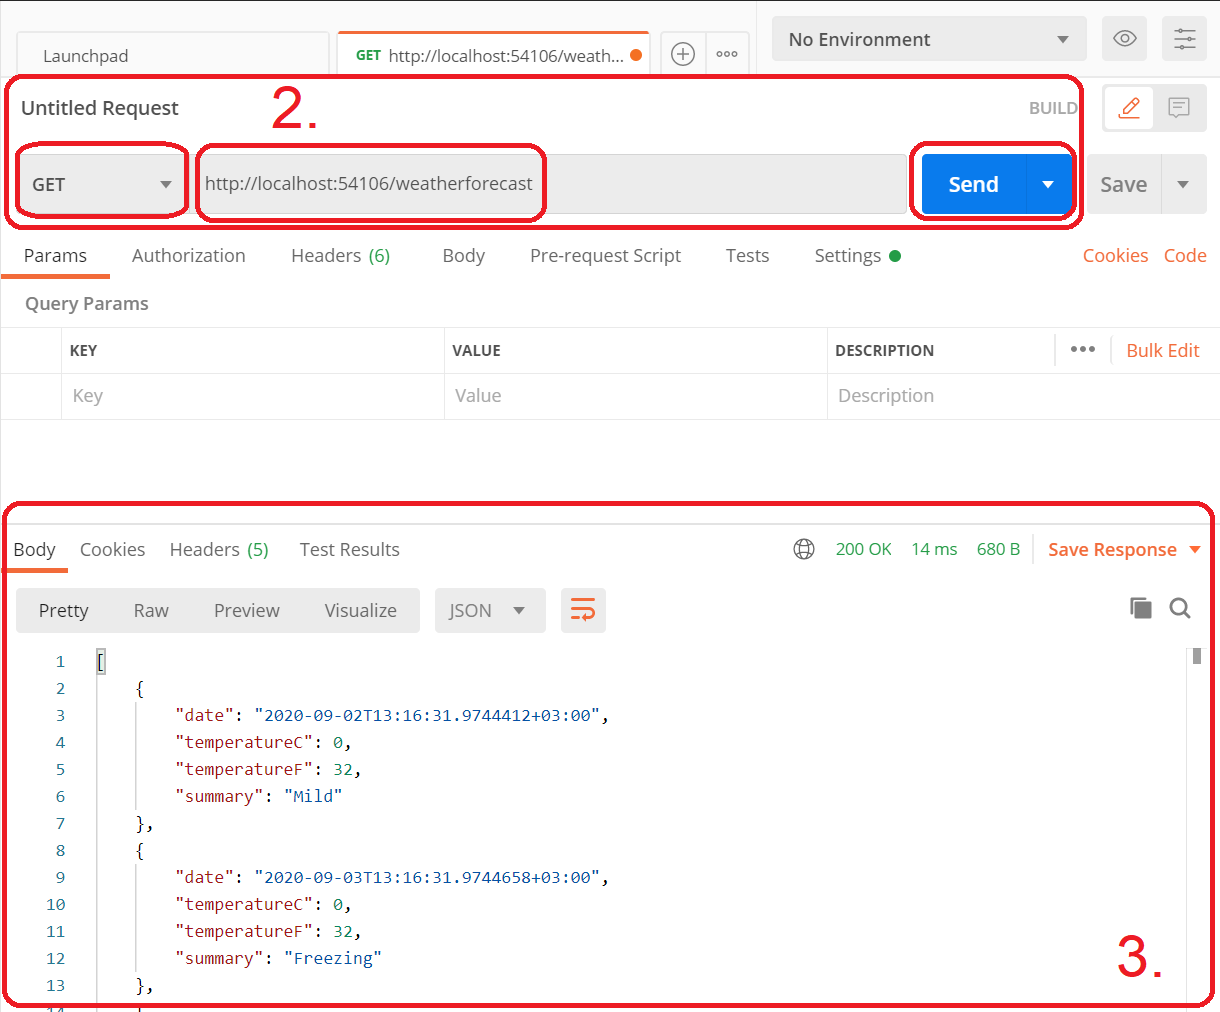
Exercise 4. Creating requests with Postman
Run the Weather API program, and test both methods with Postman.
- To get started, open Postman (You can sign in or skip the login)
- Close the opened window to go straight to making requests
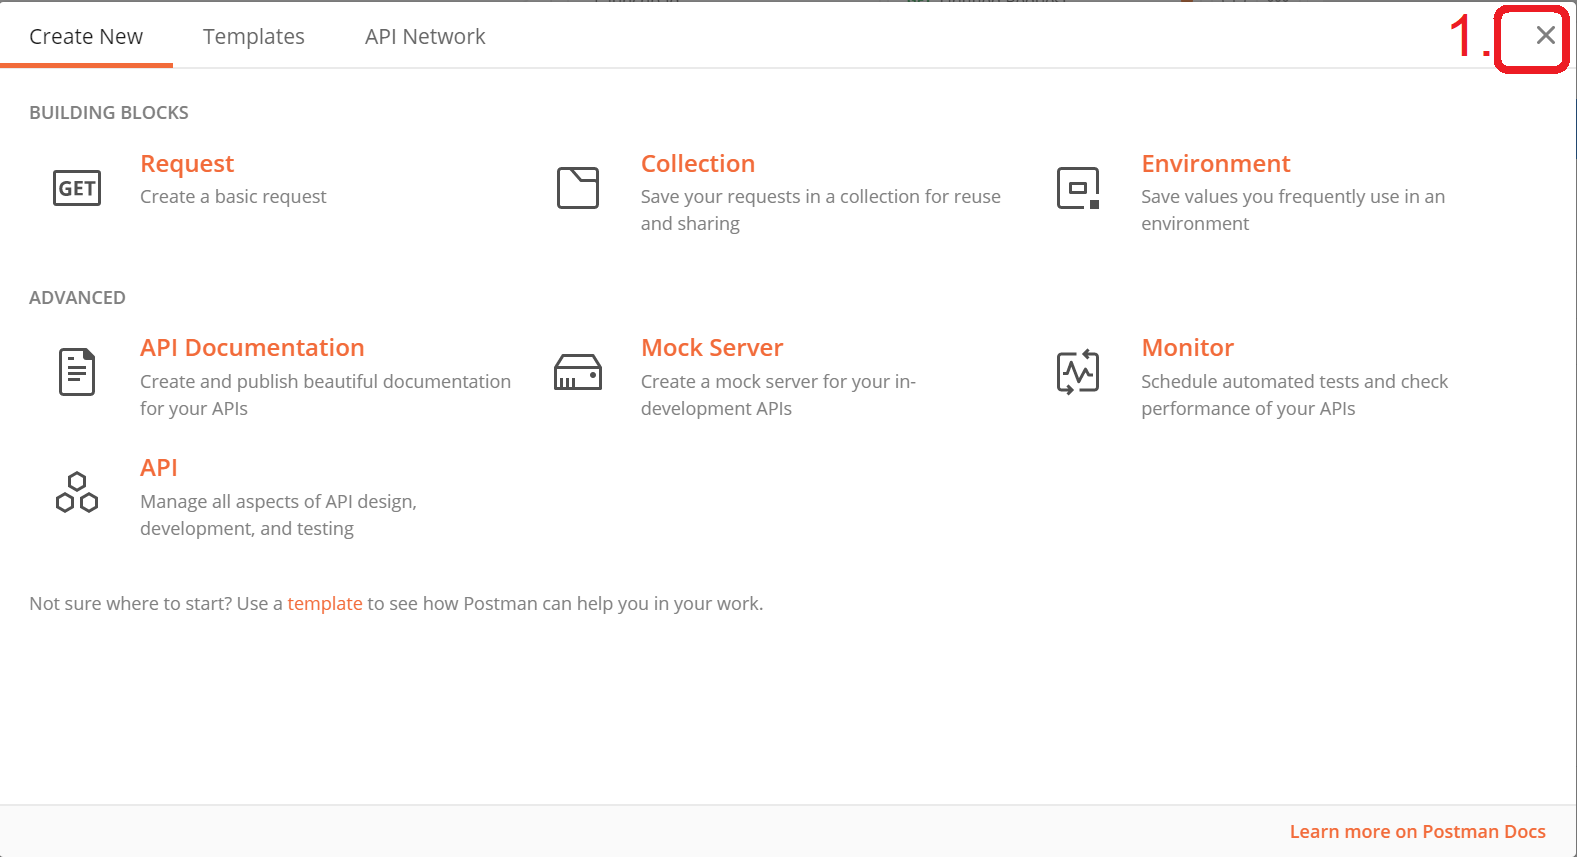
- Create your request by selecting the method and entering the URL
- The response with the content body and status code show up below!